
")
TL;DR: Sharpening is one of those simple-but-deep shop skills that separate hacks from craftsmen. Everything you build boils down to four riffs — measure, cut, join, finish — and cutting only works when the tool’s sharp. Angles matter, whether it’s 15° on a sushi knife or 30° on an axe. Grinders and belts speed the work but can burn the temper if you’re careless, while chainsaw and round-blade sharpeners each have their place. A well-stocked “sharps drawer” keeps stones, files, and guides handy, because sharp tools are safer, cleaner, and faster. There’s still a side hustle in knife and saw sharpening — restaurants, tree crews, woodworkers — and the old Foley-Belsaw rigs on eBay remind us that keeping edges tuned was once a trade in itself.
Orientation – always good on the first day of class, eh? To all be on the same page here, let me lay out the “mental indexing” of my shop and how I go about building (sometimes) really good designs – out of my head – on the fly.
First is to understand in DIY – or even licensed tradesman work – including new construction and remodeling – there are only variations (riffs, musically) on four simple ideas.
- Measure and Mark: You’d think this was basic but no – I have seen total screw ups because people got in a hurry and didn’t measure right. (Measuring is also the First Principle of Electronics – we will start on that free fall school next week…)
- Second is Cutting. And this is where we get into today’s topic. In most uses, power and hand tools are best if used as sharp as you can make them.
- Assemble, Join. We do a lot of clamping. No Parkinson’s yet – but I learned (must have been around 60, or so) 15 years back – that without a “helper” to hold things, clamps and jigs were my friends.
- Last step? Finish: this is where the sanders, paint, varnish and plastic fumes start to roll. Yum.
Somewhere, along in here, Elaine would raise her hand (she doesn’t read my columns) and say “You left out Cleanup, Tool Maintenance and Resupply…” Which is why her house is a bit neater than my shop… Somehow, I believe this is common…an actual gender difference?
This will be a collection of columns over coming months that will give you ideas whether you’re a grizzled professional or just a “thinking about it” future DIYer.
Welcome to Sharps School Part 1
Sharpening is one of those “simple but deep” ranch shop skills. Folks think it’s just rubbing steel on a stone, but the devil is in the angle and the patience. The goal is always the same: get two planes of metal to meet at as fine a line as possible. That’s your edge. Miss the angle or wobble around and all you’ve got is a polished butter knife. (Save a couple for putty & epoxy work, though!)
For knives, pick your system and stick to it. old-school whetstones work great, especially if you use oil or water to float away filings. Hold a consistent angle — 20 degrees for general kitchen, 15 if you want sushi sharp, 25 if you’re pounding wood with a hunting blade. Consistency beats brute force every time. Light, even strokes, both sides, until you feel a tiny burr form. That burr is the steel folding over, telling you the edge is real. Then you flip, refine, and strop on leather or cardboard to align the micro edge.
If you don’t have a good set of measuring tools, get thee over to your sliding compound miter saw and cut the angles that are most troubling using old hunks of 2-by-4. Measure out angles and then cut and label them for future use. Like so:
I also may have made up 22-, 23- and I think 18-degree guides, too. There’s that organizing problem, right?
In the shop, tool sharpening is about matching the cutter to its job. Chisels and plane irons get a flat bevel, usually 25–30 degrees, polished on stones or sandpaper-on-glass if that’s what you’ve got. Woodworking (double-sided) tape is useful here.
Axes? Sharpen with a file, not a grinder, unless you like soft edges from too much heat. If you are grinding with a machine, do NOT let the metal come up to yellow or blue discoloration. Temper is lost and your edge will be easy to sharpen but won’t last more than a minute. This is why slow-turning, water-bathed wheels are the knife maker’s choice.
The bigger the better. The reason here is simple: A small wheel, say 3″ will give you a quickly rounding blade edge. Again, OK, BUT it won’t wear well. Get up into a 10-inch wheel and now you’ve got something.
Always file in one direction, heel to toe, with the axe head locked down. Power tools can help — bench grinders, belt sanders — but they’re unforgiving. Again, overheat the edge and you burn the temper right out of the steel. Keep a cup of water nearby and dunk often. Some guys like oil but water is easier to clean up and you will always spill in the shop. Always.
Sharp Machines
All those warnings about machines, let’s roll through some:
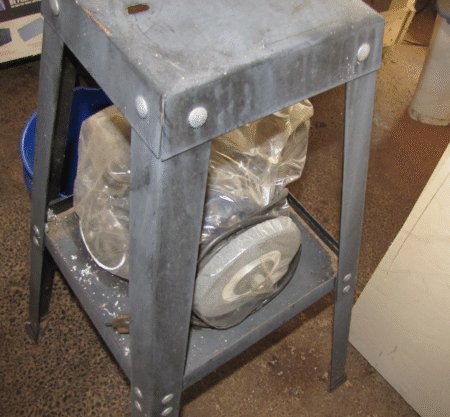
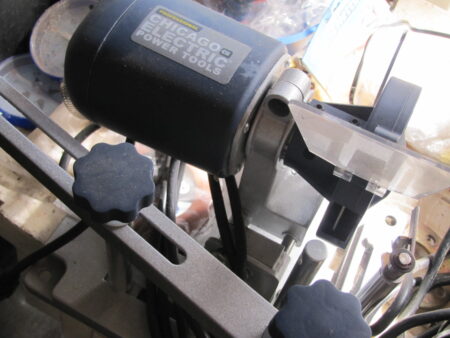
Every shop has one of those 6- or 8-inch grinders. They like to hide under things until you need them. Mine was sighted cowering here:
Final step for any edge is inspection. Your tools here are red platelets all over, optical, and cardboard or paper. Platelets first…cautiously!
Run your thumb sideways across it — never down the blade — and feel for uniform bite. Fingernails work a little better – if the blade won’t draw easily – and immediately digs in – then it’s getting close.
Paper tests work too: clean slice with no tearing means you did your job. Thicker cardboard will make you feel better (it will cut with a less sharp blade). 20-pound printer paper (you don’t need to try and cut toilet paper) is a good compromise. (Pappy used tissue paper from gifts when testing his “cut plug herring knife…”)
Remember, a sharp tool is safer than a dull one. Dull makes you push harder, slip farther, and bleed faster. So take the time, learn the feel, and in no time you’ll be the guy with the sharp knives at deer camp and the square chisels in the wood shop.
Sharps: Storage and Roughing
Storage first: Every shop of any consequence has a ton of tool storage. And it’s according to the Shop Foreman’s will. Often, it will match his “mental indexing” of work. For example, an Accountant may wish to alphabetize or assign Tool Numbers to each item. Then, with an intricate enough system they will not get much productivity but they will be able to find and bitch about everything. This is also how Accountants work in real life, too.
Others – like my buddy who is the ex Mercedes big city wrench – will have a $16,000 Snap-On with the tools laid out to perfection. He knows his own tool-handling style by heart. So if he knows that certain kind of passenger car or truck – say a Dodge product – is coming in, there’s a “secret Dodge tools: section. The most commonly grabbed? Right at waist level and so forth.
Same thing applies when comes to how your shop is organized for Sharpening things. But the problem is amplified at home. Unlike my neighbor, see, I work across a wide-range of materials. Not just 4,000 pounds of rolling stock on 4-wheels. A lot of things here are grains of sand under the 10″ SMT electronic circuit microscope.
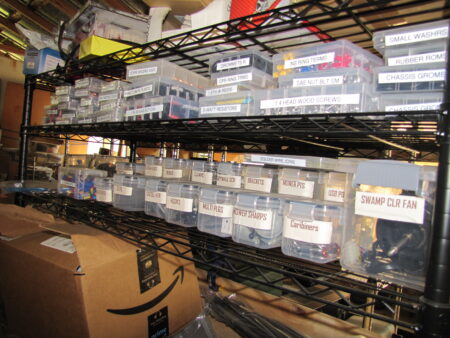
My solution? First are the basics like: Grippies, Twisties, and Screwies (areas where pliers, wrenches and screwdrivers live). And because the shop is not big enough for a devoted tool roll-around for Jig and Sawz-all chests, I generalized most of my “Don’t-cut-yourself tools!” in “The Sharps” drawer.
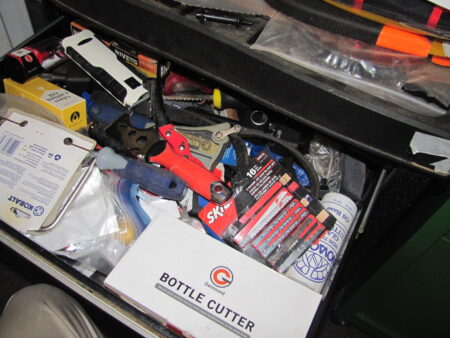
It may look like a god-awful mess (OK, it is, then…) but if you need an odd jig saw blade, the bottle of Japanese cutting oil (to put the ultimate edge on Japanese saws and lonely Ginsu collections – or you just need that 12-inch long-handle razor scraper to get an old registration tag off the unreachable part of the windshield? This is where you would start.
Now let’s take a typical shop task – like touching up a chisel. From tool retrieval, you could wander over to the small wood and knife parts grinder:
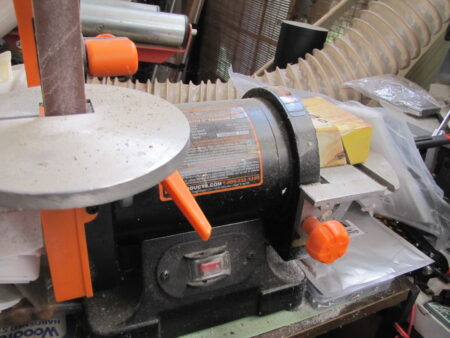
These are also very good for building dollhouses and scale models of housing additions you’re thinking over.
No? Well let’s “finda-grinda!”

The theory is that the plastic wrap will keep dust off the plastic. But since we have Plexus plastic cleaner left from the airplane, who cares, right? Besides the plastic wrap seems to attract sawdust…
Where would this be? Why under the properly signed area of the shop, of course!!!
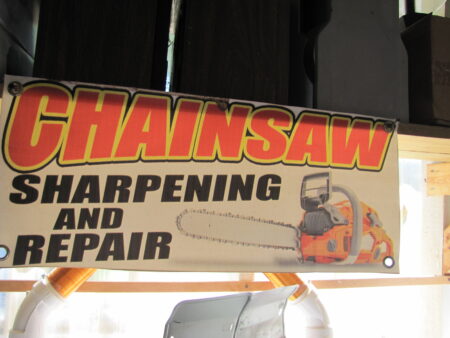
I know what you’re thinking: “George, that sign would imply that you do general saw sharpening and things like chainsaws…so isn’t that like, oh, FALSE ADVERTISING?”
Exactly! I used that on Elaine. “You know dear, with that sign up in the shop, we could wake up one morning with customers lined up around the block (which is 12.3 miles out here in the woods). So to avoid Lawsuits (!!!) I need to buy more tools.
And yea, verily it was so.
A little something for table saw blade sharpening:
And for the “chainsaw” gang?
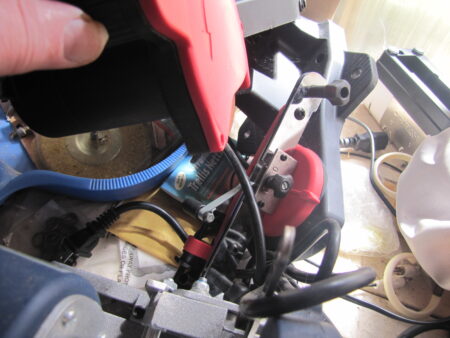
Which – don’t mention it – does look slightly used, but it needs to be clamped to a bench top and I have made some progress sorting out the electronics and metalworking parts to get some free benchtop showing again…
If you are a psychiatrist, you should have signed the papers several paragraphs earlier – now you’re in the same boat with the patient! Which is OK because this patient has a Drill Doctor, too! Because I have tons of whats?
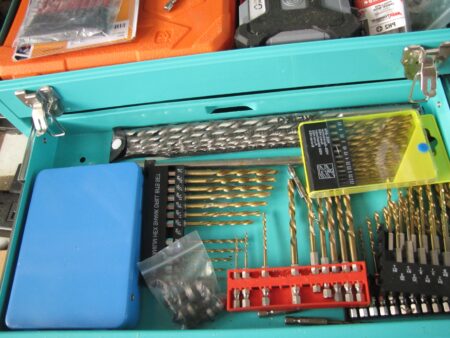
Mind you, this is just the main bench collection – the real depth (things like concrete, masonry, and granite/glass drills and the Forstners and the spades are mainly at the drill press station on the east bench.
The Drill Doctor was picked up (small size) on eBay and a few weeks later, the larger one. Great tool and more than a “bit” of fun…Estate sales are your friend (and Prime Days, too) when you are “shopping.”
You know, that sign isn’t entirely a joke. I have enough shit tools to sharpen (we didn’t go through the stones and whets and files yet…) but YES! I have thought about setting up a small cabin down on the corner where people could come in, drop off a saw, and get it sharpened.
Are Saw Sharpening Shops Still a Viable Business?
Knife and saw sharpening was once a staple small-town side hustle. We are not in the middle of the city, but over time, the city will have to come here. Cities are broken.
Back in the day? The milkman and the knife man made their rounds. Today, fewer people repair and more replace, but there’s still money in sharpening. Restaurants pay to keep kitchen knives keen, tree crews need chains sharpened, and woodworkers want their saws tuned. Chisels and gouges. It won’t make you rich, but in the right rural setting, it can be steady pocket money. Plus, it’s a craft people respect, and that reputation travels faster than advertising.
The other set of tools I have been collecting as a “when it all blows up and basics will matter again” option is a rustic wood furniture-making business. God knows, as a tree farm we have the raw materials…
G2 and I have kicked around setting up a custom log cutting operation, too. “Drop off your logs and we will cut them for a fee” kind of thing. Better use than biomassing, don’t you think?
Looking at gas powered sawmills now… HF has some.
Sidebar: Foley-Belsaw
Secrets of the rainy-day eBay tool slut:
Back in the day, Foley-Belsaw was the gold standard for home sharpening setups. Big, cast-iron rigs that could handle circular saw blades, jointer knives, planer knives, and chainsaw teeth. Every small-town sharpener either had one or wanted one. The company ran training programs by mail, teaching thousands how to set up shop in their garage. Foley-Belsaw’s heyday has passed, but their machines still pop up on eBay, usually dusty but serviceable. They’re a reminder of when sharpening was a trade unto itself — and they’re still solid iron if you want to revive the tradition.
You can still find not only Foley-Belsaw tools on eBay, but they also had dandy locksmith tools like key-cutters and such. I have their saw shop business book/course around here somewhere. And I went through their small engine repair course, too. Which is a great fit with a saw shop in a rural area.
On that note, like we say in East Texas, I have to get back to rat-killing now. One of these days it’s going to cool off enough that Elaine will stop believing my “it’s too hot” excuses. For now, I feel the urge to buy another tool coming on…
Solar: Two for the Road
First, is the most common question people seem to ask: How do you know when you are welding up your tee-post and rebar adjustable solar racks, how to figure the right solar angle? Well, that’s easy. Take your latitude (north of equator only) and ADD 15-degrees. Since Palestine, Texas rounds off to 32 degrees, that means our useful winter angle is about 47 degrees. I used 45 being lazy.
Summertime works the other way: Latitude (still 32 unless the crust shifts this winter…) MINUS 15 degrees. I used 18 degrees, not 17 because most mobile homes are 18.2 degree pitched, or thereabouts.
If you wanted to totally optimized in a a mid spring, mid fall setting? Once you have the length for your summer angle supports (which you’ll remember are 1-1/2 in diameter PVC pipe hunks), pick a midpoint between the summer length and the bottom of the lower support bar.
In my case (on one of the arrays) the supports are 45 inches and the lower support is about 30 inches. Midpointing that? 37-1/2 inches but now you’re making more work because you will be adjusting panels 4 times a year, not twice.
Next question seems to be How do you Measure reliably.
Answer: Spend money. $18 minus a penny at the Zon:
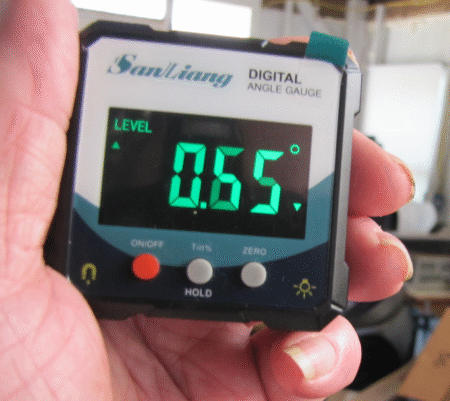
You have money? We have tools and seeds (and guns and water and…….oh….loose lips?)
Inquiring Minds Follow-up
How well is our solar working?

 And: “What is the everyday carry knife out there in the woods for you, G?”
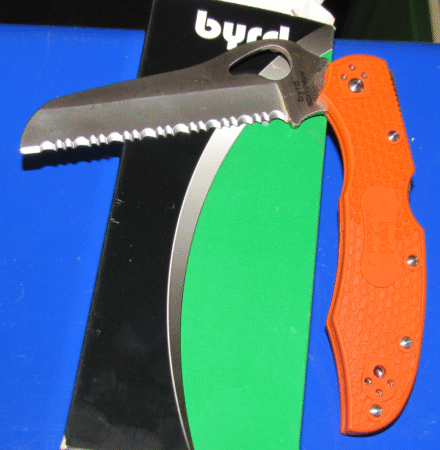
This is called a “Byrd Cara Cara 2 Rescue Lightweight Knife with 3.88″ Stainless Steel Sheepfoot Blade and High Performance Orange FRN Handle – SpyderEdge.”
I go through one of these about every two or three years. Yes, out here is about as tough on knives as it is on lazy people.
Why? It’s one of the few knives that meets all my requirements.
- Foremost is it is a one-hand opening blade. Wet hands or dry, it’s always at the ready. I have a lot of blades to choose from including some almost DELTA/JSOC-USSOCOM/SEAL6/ quality Leatherman products. (Get the extra tools, if you go this route. Maybe start with a LEATHERMAN, Wave+, 18-in-1 Full-Size, Versatile Multi-tool for DIY, Home, Garden, Outdoors or Everyday Carry (EDC), Black $120. Accessorize with LEATHERMAN, Bit Kit, ($31.46) 21 Double-Ended Screwdriver Bits for Multi-Tools and the LEATHERMAN, Bit Driver Extender Add-on Accessory for Multi-Tools, ($27 )
- Second: Serrated edge. Yet, if you are doing surgery, a #10 scalpel plus a cautery knife…but if you need to cut away in free-fall or on a pitching deck in the wet/dark, serrated is the only answer.
- Third: reasonably priced ($42). Spendy enough to be good steel, cheap enough you can take a hammer to it to use as a wedge when you get 4-tons of tree binding on a chainsaw (don’t ask).
Count your fingers before and after your shop visits…especially around knives, power tools, and sharpening gear. You know…the stuff we go to the shop for….
Write when you get rich,
[email protected]
Read the full article here